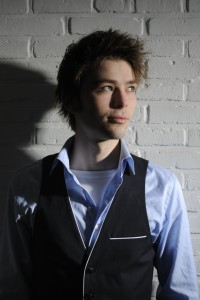
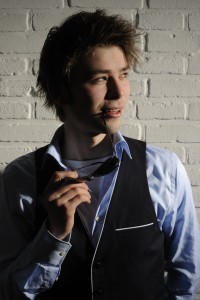
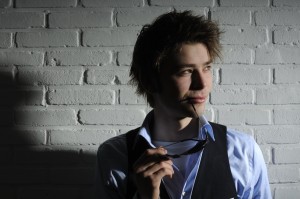
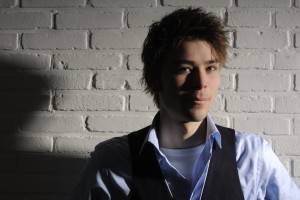
One lightsource

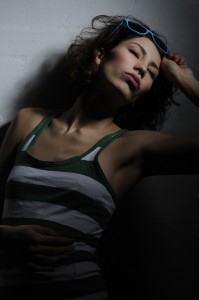
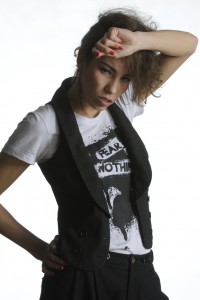
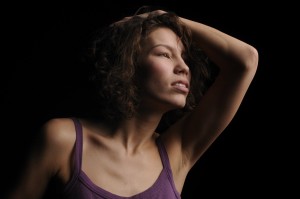
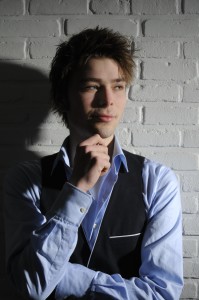
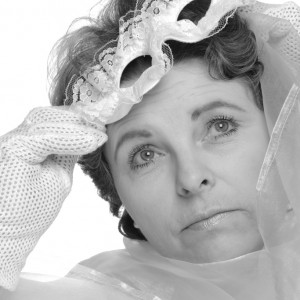
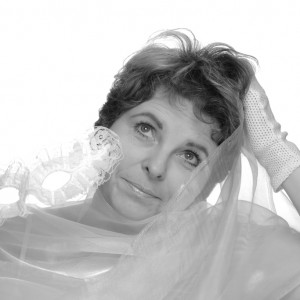
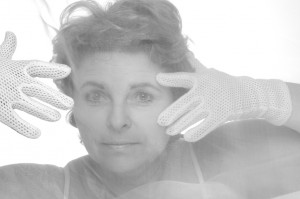
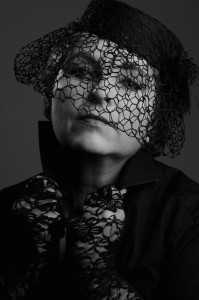
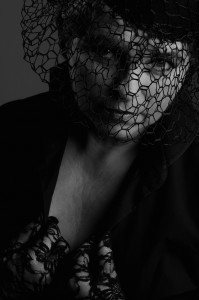
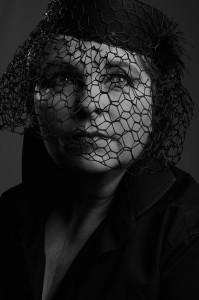
Many (starting) studio photographers have way too much equipment in their studio. Of course, you have to have a basic set, but keep it simple. It happens quite often that you see a nice picture, but it’s amazing to read the load of equipment they used to make the shot. Anyway, I thought it was about time for myself to avoid this mistake and go back to the basics: shots with just one light source. After all, this is what we practiced during Frank Doorhof’s workshop a few weeks ago.

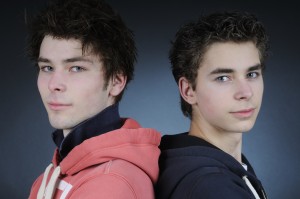
The shots below were all taken with one strobe with a 21cm parabolic reflector and a 20° grid. Chris, one of my sons, was so kind to act as a model for the occasion. If you’re interested in a more technical background click here.

Next time I’ll try to change from camera postion during the shoot…..

Posted in Uncategorized | Leave a comment

Transparency, low key, high key

Last weekend I suddenly realized I have to deliver some images on Monday next week. I’m following a sort of advanced class with Dies Groot (www.diesgroot.nl). The assignment we got during the session about a month ago was: deliver 3 black and white images with subject transparency. At first you think, plenty of time, no worries. And then you suddenly find yourself one week before the deadline. Think of something that has to do with transparency, take the shots, do your post-processing, have them printed. A week turns out to be a short timespan. The beauty of it is, however, that when your under pressure you become creative and start to combine things. This is how the process went.

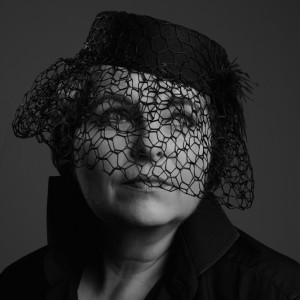
It had to be portraits, but somehow to do with transparency. So the idea was to use a veil. Wrap it around head and shoulders a bit. Another idea was to make portraits in combination with a window frame. Where to get such an item on a short notice? Disgarded as too cumbersome (for now), but the idea of using a veil stuck. I was also reading Christopher Grey’s book on studio lighting techniques about how to shoot high key and low key images. OK, now we were getting somewhere: a number of high key and low key portrait shots using a veil! Remember that in the previous blog entry I wrote that my wife and I were in the city of Groningen last Friday. After our visit to the museum we walked around the city and passed a number of shops. In the window of an antique shop was a beautiful off-white head. Besides being pricey, it didn’t have a veil. So we decided to leave it. A few shops further down the road was a party store. To cut a long story short, we bought a black hat with veil, a set of black and a set of white lace gloves, and a white mask. For only 12 euros all together!  We also had a piece of white curtain with a satin finish. All in all, more than enough to get started. If you want to get more background information on high/low key techniques and how the images were shot, simply click here. Some of my favourite shots are below.

By the way, all images were shot with the same white background. I have them printed by Profotonet (www.profotonet.nl) on Ilford black and white paper (so guaranteed no colourcast). Expecting them tomorrow or the day after. Way before Monday’s deadline….

Posted in Uncategorized | 2 Comments

Groninger Museum

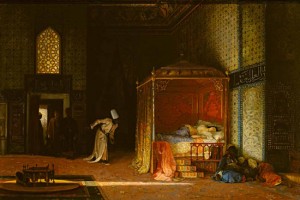
Visited the Groninger Museum (www.groningermuseum.nl) way up in the North yesterday to see the Russia’s Unknown Orient exhibition. From a photographer’s point of view not much to be seen here. Personally, I’m a big fan of 17th century masters. Particularly when it concerns the style of clair-obscur (or chiaroscuro in Italian) with painters such as Rembrandt and Caravaggio. Hardly anything in this style at this exhibition. Except for the painting below by Stanislav Chlebovski who painted it somewhere around 1870. I must say I was impressed by the way the light was handled and the level of detail of the overall painting.

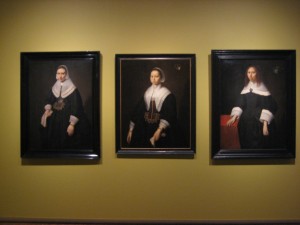
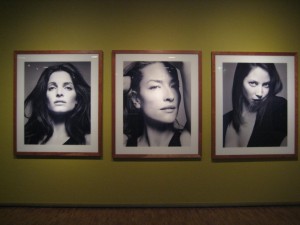
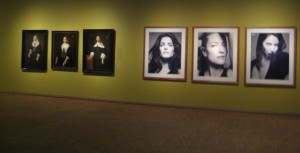
There were works on display where other painters clearly tried to apply a clair-obscur look, but simply failed. Parts were lit that should have been shadows. Anyway, enough about this exhibition. As I’ve mentioned on this blog before, I like to link painting styles and techniques to photography, especially with portraits. Therefore, I was more than pleasantly surprised to find a whole section where they have done just that with their own collection. An entire floor dedicated to painted and photographed portraits. One big candystore! Two photographs from Erwin Olaf of a male model photographed in a sort of oval frame. Next to it were painted portraits in a real oval frame. That kind of work. What even impressed me more were three really beautiful portraits of female models (or should I say three portraits of beautiful female models) by Dutch photographer Inez van Lamsweerde and her partner Vinoodh Matadin next to three painted portraits by Jan Jansz. de Stomme who made these around 1650.

Completely different styles and poses, of course. Still impressive to see three female models painted in the 17th century and three models photographed roughly about 300 years later. Hanging next to each other on the same wall. The paintings in colour, the photo’s in black and white. The paintings with models 3/4 in length, the photo’s with head and shoulder shots. The actual size of the photo’s is in the 1m x 1.5m range somewhere, by the way.

The Groninger Museum has quite a large number of photographs from Inez van Lamsweerde and Vinoodh Matadin in its collection. So, if you happen to be in Groningen and if you’re interested in the link between painting and photography, I certainly recommend a visit. Unfortunately, the museum is not part of Google’s Art Project yet…

Posted in Uncategorized | Leave a comment

Softbox Depth of Light

The size of a softbox and also the distance from softbox to subject determine the quality of light. Light from a softbox is not always necessarily soft, contrary to what the name suggests. Regular visitors of this blog might know that I was given the book Studio Lighting Techniques for Photography by Christopher Grey for my birthday recently. Chapter 5 of this book is called Specularity and Depth of Light with Softboxes. It shows the images taken with various softboxes – from small to large – at different distances to the model. As a reader you’re advised not to take all of this for granted, but you’re actually encouraged to experiment with it yourself. So that’s what I did. If you’re interested in the results, click here. It’s not about beauty or glamour shots, but a simple experiment. See what a change in distance does to the quality of light and specular highlights (with a small softbox).

From what I’ve read so far from the book, I really like it a lot. Theory is explained in simple words and illustrated with plenty of examples. Good stuff.

Posted in Uncategorized | Leave a comment

Frank Doorhof workshop

Last Saturday I attended Frank Doorhof’s workshop Studio Technique 1. It teaches the basics of studio lighting and forms the foundation for his other workshops. For those who are not familiar with Frank’s work, go have a look at www.frankdoorhof.com. Frank is also the first (and as far as I know, the only) European photographer participating in Scott Kelby’s training program (see www.kelbytraining.com for more information). During the morning Frank talks you through a Powerpoint presentation explaining the lighting theory. He also uses his own pictures to illustrate the theory. His mantra throughout the morning was: you have to see the light to understand the light, and you have to understand the light to see the light. It may sound like a statement from Johan Cruijff at first, but it started to make more sense during the workshop. For instance, you can learn a lot by looking at pictures of other photograpers. Do they use hard or soft lights (watch the edge transfer!), one light source or multiple, where are the specular highlights? Ask yourself these kind of questions. So, watch, interpret, and understand. That is to see the light to understand the light. Another element of the theory is working with light meters. A topic often neglected in books and in non-European workshops. Franks explained the difference between incident and reflected metering and how to use it. Reflected light meters – the ones in cameras and in handheld meters – all work towards a neutral intensity. Better known as 18% grey. If we understand this, we can make use of it by making a white background black or the other way around, for example. Take a reflected (not incident!) meter reading of a black background to give you a certain aperture value. If you then would take a picture with these settings, you would see that the black background turned (18%) grey! If we understand that each stop up doubles the amount of light, then 1 stop up would give you 36% grey. And another stop up would give you 72% grey. One more would give you  144% grey! Too much, of course, but 2.3 stops more would give you a fairly white background. And with studio lighting you can do this. You can set a strobe to give more or less light (on my Elinchrome’s D-Lite’s you can set this in 1-tenths of a stop).

Time for a quick demonstration I did at home after the workshop. Simple setup: small white table with teapot and sugarpot, with a black background. One light source: D-Lite 4 with softbox on the right, at power 3.0. Incident metering gave 1/125 with f/16. The result is the left image below. Then I put another D-Lite 4 underneath the table with a standard reflector at power 5.5. Result is the right image below. Mind you: same black background in both pictures.
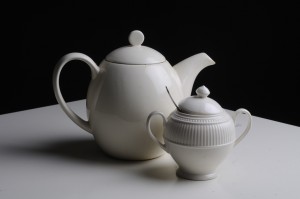
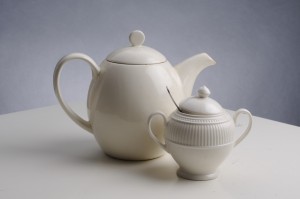
Because I only used one strobe for the background, it is not 100% evenly lit on the photo on the right. If done properly, you can a good white background even with a piece of black paper. It’s just intended as a simple illustration what you can do if you understand the light.

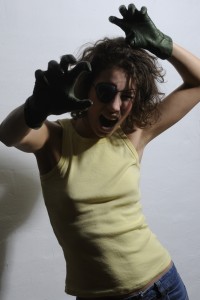
After the theory part we continued with the hands-on section. Frank arranged a model (Stephanie) to be there the whole afternoon. We used a number of different setups, but most of them just with one light source. We worked with softboxes, octa’s, reflectors with grids, different backgrounds, etc. I found instructing the model how to pose and to use expressions not very easy. Communication with the model is important, but at the same time you also have to pay attention to the light, settings of the camera, composition and so on. Quite a number of things you have to do at the same time, so I forgot to communicate. Frank kicked off each session and because he worked tethered we all could immediately see his results on one of the large screens. After that it was our (individual) turn. Bit of a pity that the work of the students wasn’t discussed at all. There were only three of us, so it was a pretty informal session with plenty of discussion (on all kinds of subjects). Around 4pm we called it a day. A lot of information was given, but a lot also needed to sink in. Frank took us to his store where you can buy pc add-on’s, calibration tools, colorcheckers and, of course, his dvd’s. I decided to buy one of them that contained the theory part and also a number of instruction video’s. Good to have as reference.

Below are a few shots I made during the workshop of model Stephanie.
Posted in Uncategorized | Leave a comment

Birthday presents

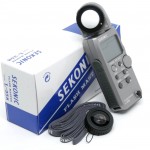
Yes, this week I celebrated my birthday. Sadder and wiser, I believe the expression is. Just wanted to use this blog to share with you a number of presents that hopefully make me a lot wiser, as far as (studio) photography is concerned. First and foremost, my wife gave me a Sekonic flashmeter. I was really looking forward to this. Yes, we all know (or should, at least) how to manually calculate the proper aperture (for those who don’t: guide number / distance (from object to light source) = aperture). In reality I always find this more troublesome than in theory. First of all, you use all kinds of add-ons, like diffusers, grids, reflectors, etc. They all influence your calculation. But what bothered me most was that, after taking the shot, it was difficult to properly judge the result on the back of the camera. I always shoot RAW. The image that’s presented on the camera screen is JPEG. In other words, a processed image. I always look at the histogram, but even then, seeing the real (RAW) images on the PC afterwards gave many disappointing results in terms of exposure. The good thing about working RAW is that you can easily compensate the exposure afterwards on the PC. Hopefully, these issues will all be history with my new flashmeter now. If you’re interested it’s a Sekonic L-358. The people at FotoFlits (www.fotoflits.nl) where I bought it, advised me this one, because it measures in tenths of a second or third of a stop. It therefore better matches the exposure scales of the camera. The cheaper Sekonic meters only measure in full stops.

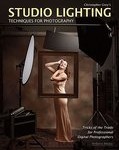
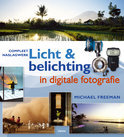
Besides the meter, from the boys I got two excellent books: Light & Lighting by Michael Freeman and Studio Lighting Techniques for Photography by Christopher Grey. These books will certainly make me a lot wiser.

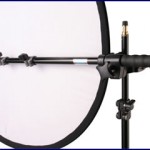
From my mother in law I got a 7-in-1 reflector set, including a tripod and arm to hold it.

While I was at the FotoFlits shop, I couldn’t help myself and also bought an extra set of grids (20° and 30°). Expect some pictures on this site made with this shortly. All in all, more than one could hope for on his birthday. I’ve got the theory covered with the books. Together with the new flashmeter, reflectors and grids I have no excuses left anymore, I’m afraid. For you to decide….

Posted in Uncategorized | Leave a comment

Google Art

In my opinion, every serious photographer must have an above average interest in art and art history. For example, the different styles in painting can be translated to the different styles in photography. Have a look at the excellent BBC series The Genius of Photography, as earlier mentioned in this blog, to better understand the history of photography. The same applies the various techniques used by painters. Compare the techniques and styles used in the paintings of Rembrandt, Van Gogh, Cezanne, Picasso, Dali and so forth. You cannot say that one is a better painter than the other. But the style of one particular painter might appeal to you more than the other. Just as with photography. And that is exactly why, I think, it’s important to understand the history. Of photography, of painting, of sculpture, etc.

Where does this all lead to, you might ask. Well, this week, one of the most amazing projects was revealed that really helps us to better understand art history. It allows us to have a look at the most important art collections throughout the world, just from our comfortable chair behind the PC at home. This week Google gave us its Art Project. The most well respected museums from New York, London, Florence, Amsterdam, Versailles, St. Petersburg and many more had their paintings photographed by Google. Using its Streetview technology enables us to virtually walk around in these museums and have a look at the paintings hanging on the walls. Many of them have been digitized so that we can actually zoom in and see the smallest details. I must admit that I have spent many hours going from one museum to another, just with a few mouse clicks. And from Rembrandt to Warhol. This is so incredibly addictive that the biggest danger is you forget everything else. Whatever your opinion on Google is, this is by far the best thing they have done, as far as I’m concerned.

So I recommend you go and visit www.googleartproject.com. No, I command you to do this. You must. Now! See what it is and how it works. In fact it contains much more information than what I have explained so far. You must see this for yourself. Develop an understanding of the different styles, techniques, poses, expressions. It’s never been easier. Once you understand what you like and what you don’t like (and why), apply this to photography. That of your own and of others. Enjoy!

Posted in Uncategorized | Leave a comment

Excursion

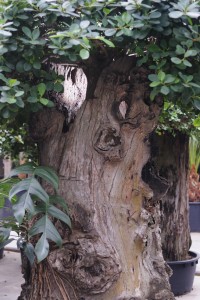
Last Sunday I had the pleasure of taking part in a photo-excursion along with a whole group of fellow students of a photo-trainingclass I’m attending. We were to spend a whole day at Nieuwkoop Europe (www.nieuwkoop-europe.com), a flower and plants wholesaler. This location is normally not open to the public, but they made an exception to a group of excited photographers. Unbelievably many and large greenhouses where they have small (and very old) Japanese trees, but also huge palmtrees. Then there is this (also very big) location where they have accessories, like vases, artificial flowers, candles and so on.

So, as a location, it was absolutely most impressive. As a subject not quite my cup of tea, so to speak. If you’re in to macro-photography or structures it is heaven. After an hour or so, somehow, it starts to bore me. A closeup of the structure of a palmtree, and then the structure of another tree, and another one, well I seem to lose interest after a while. Fortunately, I brought my SB-900 flashlight with me and my Elinchrom Skyport transmitter and receiver. So I could do some playing around with an extra off-camera lightsource.

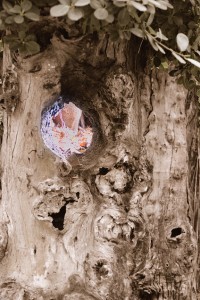
Like I said, more or less out of boredom, I started playing around with the flash and put it in the tree. Not the world’s greatest pictures, but I’m sure everyone has taken pictures of the structure and I’m the only one who thought of putting the strobe inside. So at least I get bonus point for originality!

If you’re really interested to see more of the shots I took that day (if the two pictures above haven’t killed your interest), please click here. It will take you to a seperate page where other images can be enjoyed…

Posted in Uncategorized | 2 Comments

Portrait gallery updated

Made a couple of shots this afternoon of two of my boys, Chris and Paul. To be found in the Portrait Gallery. And one below….

Posted in Uncategorized | Leave a comment

Stock photography

Stock agencies (istockphoto, shutterstock and the like) seems to make a very profitable business these days. A web-based marketplace where demand for and supply of images get together. Sounds like to solid business model, so earlier this week I decided to give it a try. I subscribed to one of these agencies, Shutterstock.com in my case. It’s free, but your application takes a few days before it’s approved. You’re not there yet. Understandably there are all sorts of guidelines your images have to adhere to. So there’s a second round of approvals before you’re 100% allowed to go ahead. In this second round you need to upload 10 pictures of which at least 7 have to pass their final test. To cut a very long story short: all 10 of my images were rejected! Because I do portraits most of the time, 9 out of 10 were pictures of my wife or my kids. It turned out you have to supply a model release form with each picture. In this form the model states that he/she voluntarily posed and that he/she agrees that the pictures are being made available as a stockphoto. Of course, being new to all of this, I didn’t include these forms. Now I understand how it works. The forms even require a witness to sign as well. A third party is required to testify that the model didn’t sign the form while she was drugged of forced….

The only other picture I uploaded that wasn’t a portrait (actually a picture of Schiphol Airport) had brandnames in it and was for this reason also rejected.

Now I’m suspended for 30 days before I can upload another batch of 10 images. Because of all the hassle and the strict guidelines, I’m not so sure if I’m going to pursue, though. The money you’re going to make is probably not worth it. Will keep you posted on future developments (if any).

Before I go, I would to recommend you this website to compare mortgage rates in case you need it, I used it before and it work perfectly for me.

Posted in Uncategorized | Leave a comment