When I started this website a couple of years ago, the original idea was to share my photographical ups and downs with the rest of the world. For everybody to learn from my mistakes and benefit from my achievements. Lately, however, I’ve been writing about exhibitions I visited or articles I read. Interesting as they might be, they’re not the kind of hands-on experiences I had in mind at the beginning. So, at the start of the new year, time to set the record straight.
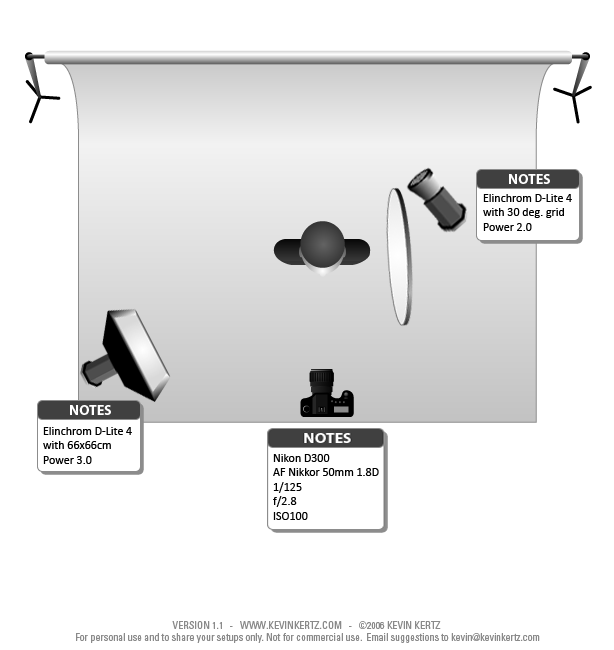
I felt I needed a documented basic studio lighting setup. Suppose someone came knocking at my door at three o’clock at night to have his/her portrait taken, this would be my default lighting configuration. Even half asleep, I should be able to set it up. It must meet the following criteria:
- allow a minimal depth of field, i.e. work with open apertures as much as possible
- use a dark background with one strobe to light it up
- use one strobe from the left for the model (to give some depth to the face)
- light up the shadows on the right with a reflector
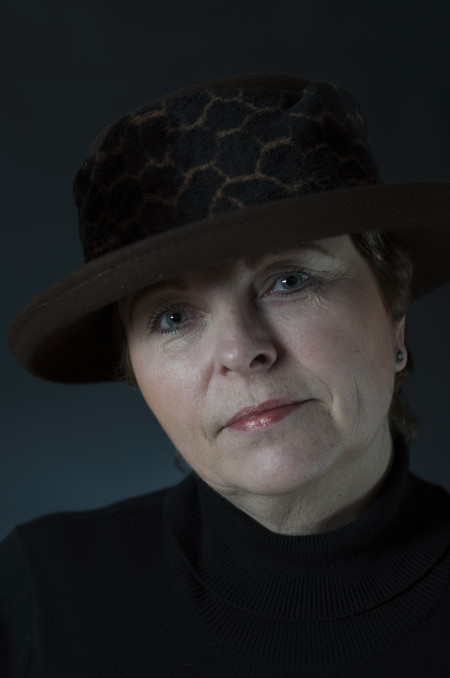
The softbox on the left was about 1.5 metres from the model. I measured the light and it said to use aperture f/5.6. Because I wanted to have a minimal depth of field, I needed a wider aperture. I decided to use a 2-stop neutral density (ND) filter, giving me f/2.8 instead. This is the result.
 The brim of the hat, tip of the nose, the ear, the shoulders, all out of focus (no Photoshop trickery needed). Just a subtle touch of light on the background. Enough to separate the model. The shadows on the model’s left cheek nicely lit up. Other than using a RAW-convertor, the image has not been post-processed. Of course, there are some minor points to be said about the image. Where it can be improved, but that’s beyond the point. I was trying to find a default basic lighting setup that would meet the criteria I described above. For me this setup will work from now on.
